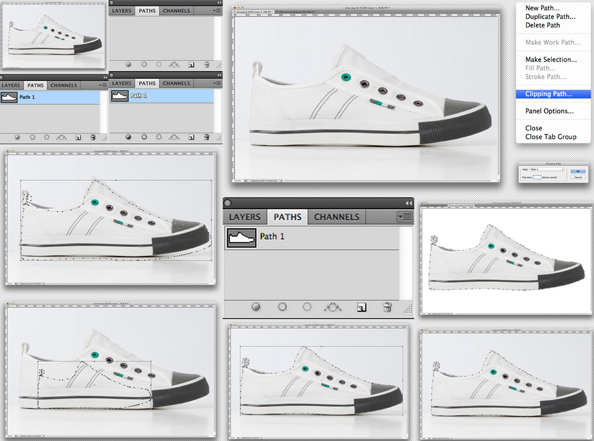
Most graphic designers at their early ages often face a common problem on transferring a clipping path from one image to another. In fact, transferring clipping path from one image to another can be really simple, if you have two copies of that image- one with a clipping path and the exact same copy of that image without any clipping path. This can be much handier when your clipping path is on a light and compressed JPG image file and you want to transfer that clipping path to an uncompressed larger image file of PSD or TIFF format.
As I said before, if you have two images- one is with clipping path and another one is without clipping path, you can transfer the path with lesser effort. For this, you at first have to open both images next to each other in Photoshop and then drag the clipping path from the path window to the image which is without clipping path. At this, the clipping path will be copied and placed on that image without clipping path. Now if you pay a closer look, you will see that though that clipping path has been transferred to the next image, the path is still inactive. To activate that path, you need to go to “Option” in the path window which is at the right top of your screen and then select “Clipping Path”. And finally your newly created path is now live!
Usually, the clipping path’s location is identical to its original image. But if your two images size, with and without clipping path, aren’t exactly the same, the clipping path won’t be 100% accurate in place. But you don’t have to worry, because this can be easily fixed by moving the clipping path. In order to move the path, you have to select that path and then select all anchor points using the ‘white selection tool’ which is located at the toolbar. After selecting all the anchor points, you can control the path’s position with the arrow keys of your keyboard. You can also control the size of the path with [CMD][T] and then pulling the corner by pressing the [Shift] key to maintain the path size.
